
This evening, I returned to the Button Monogram project that I abandoned earlier in the week when I could not make a final decision on whether to use an eclectic mix of button colors or a hodgepodge of white buttons. Obviously, I chose the latter. This is a pretty self-explanatory craft. Pretty easy, and since I had all the supplies needed lurking in my closet, it cost $0.00 to do!
.JPG)
Before firing up the glue gun, you will want to decide on your fabric and button choice. My first attempt at this project was using the variety of buttons so I spread them over the fabric choices to decide. When I changed my mind to using all white buttons today instead, I used this same technique and swathed all white buttons over my fabric choices to see which combination I liked best.
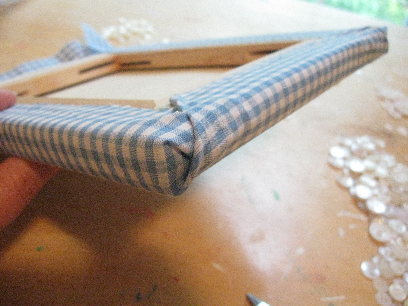
Once decided, you are going to wrap the canvas "Christmas present style" and hot glue the corners in. Avoid the urge to use too much glue because it will make the bottom edges look lumpy and take away from the overall appearance of your project.

Next, separate your entire button collection into coordinating colors, and once you have decided which color to use, separate those buttons into small vs. large, 4-hole vs. 2-hole, matte vs. shiny. Actually, I am kidding. Do not do this unless you are OCD-tinged like some of us and want to turn a 1-hour project into a 4-hour one!

Instead, with a pencil sketch out your chosen letter directly on the fabric. Do not bother trying to be fancy or cutting out a stencil for this. Your buttons are going to ultimately determine the shape for you and too much pre-planning would be a waste of time. Next, lay out your first layer of buttons on the sketched alphabet. Don't glue until you have laid it out first and are pleased. Use your biggest buttons first to form a base Don't worry that it looks too uniform, or "neat," adding the layers of buttons will give a personality!

Then... you just keep gluing and gluing until the World Tetris Champion could not possibly find another spot to fit a button. It works best to progressively with with smaller and smaller buttons so the tiny ones can be clearly seen on top. To hang my canvas, I simply hot glued a piece of ribbon to both sides of the back canvas and tied them together in a bow to hide the nail hanging the print.

No comments:
Post a Comment